Sometime back, I created a small wrapper called Ollama4j to interact with the Ollama server over the REST API in Java as
a side project and made the repository public on GitHub. Over time, the project
gained traction, with many fellow Java
developers contributing, and it now boasts over 300 stars! 😍
We’ve consistently introduced new features, and when we added the tool-calling capability, the library became incredibly
powerful, opening up so many possibilities. With this addition, we could automate numerous tasks using natural language!
I wanted to share how to make the most of this functionality.
In this article, we’ll explore how to use Ollama4j, a Java SDK for interacting with Ollama-hosted models, to leverage
tool-calling models like Mistral for querying a Couchbase database. The goal is to create a system where you can query
your database using natural, conversational language — just like interacting with a virtual assistant. We’ll walk you
through the code, explain the key components, and show you how to set up your environment to ensure everything runs
smoothly.
Overview of the Technologies Involved
Before diving into the implementation, let’s understand the core technologies we’re using:
- Ollama4j: A Java SDK that interacts with hosted AI models through a convenient API. Ollama allows you to interact
with
pre-trained models (like Mistral) and access additional tools that can be applied to real-world tasks.
- Mistral: A powerful, language-based model that can be used for a variety of tasks, including answering questions,
text
generation, and data retrieval from external sources. While I’ve used Mistral in this instance, you can easily replace
it with any other model that supports tool-calling capabilities.
- Couchbase: A NoSQL database that provides a flexible and scalable data model. In this example, we’ll query a
Couchbase
database to retrieve airline information.
The magic happens when we combine these technologies to allow the model to query the database in a more intuitive and
human-like way, acting as an interface between the user’s natural language and Couchbase’s structured data.
Oh, by the way, you can either set up
a Couchbase server on your own or, if you prefer a
more
effortless approach like
I
do, give Couchbase Capella a spin. It’s a fully managed
Database-as-a-Service (DBaaS) with a free tier 🎉 that’s so
easy
to set up, you’ll be querying your data in no time. It’s perfect for developers who want to dive in without any
hassle —
it’s like having your own cloud database, minus the headache!
In the following section, we will walk you through the simple steps to create your free Couchbase Capella database
cluster. If you’d prefer to set up your own Couchbase server elsewhere, feel free to skip this section and go directly
to the Code Environment Setup section.
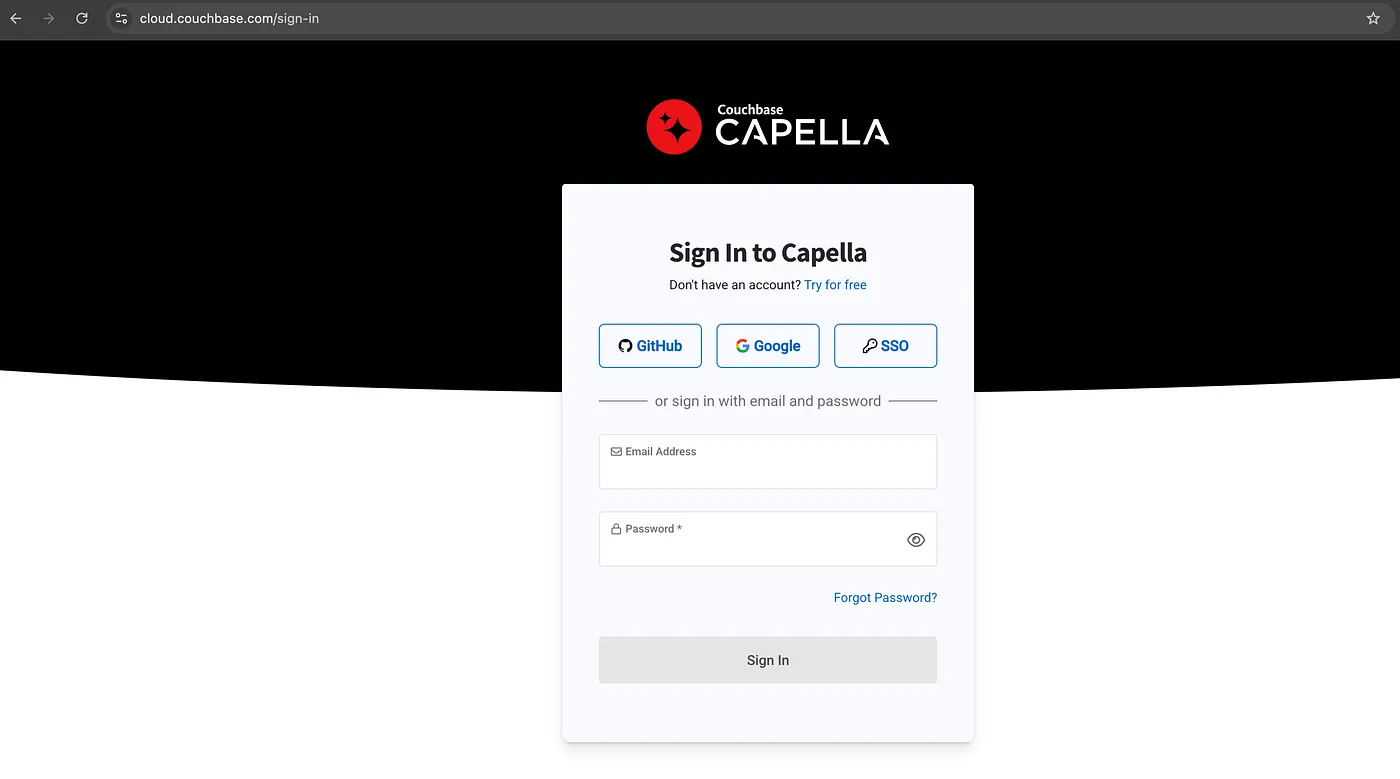
Sign up for a free database cluster on Couchbase Capella
Head over to https://cloud.couchbase.com/sign-in and sign up for an account.
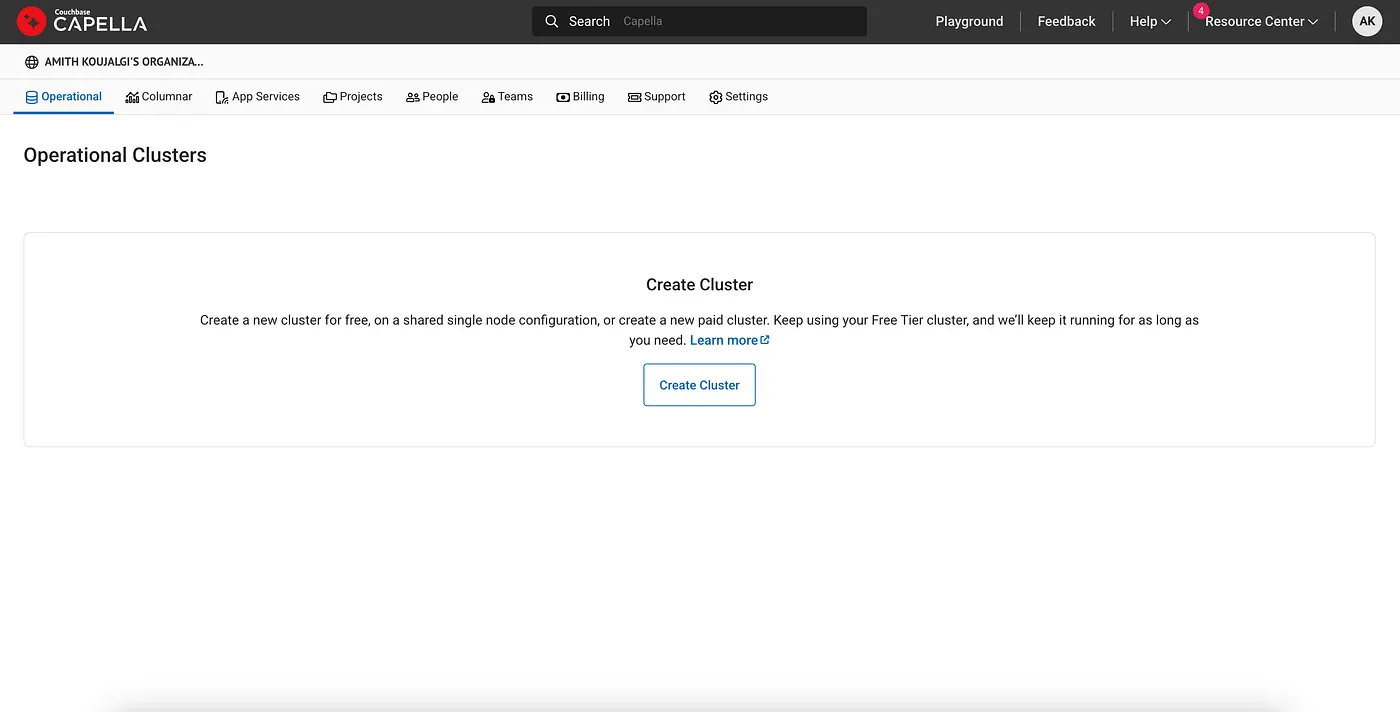
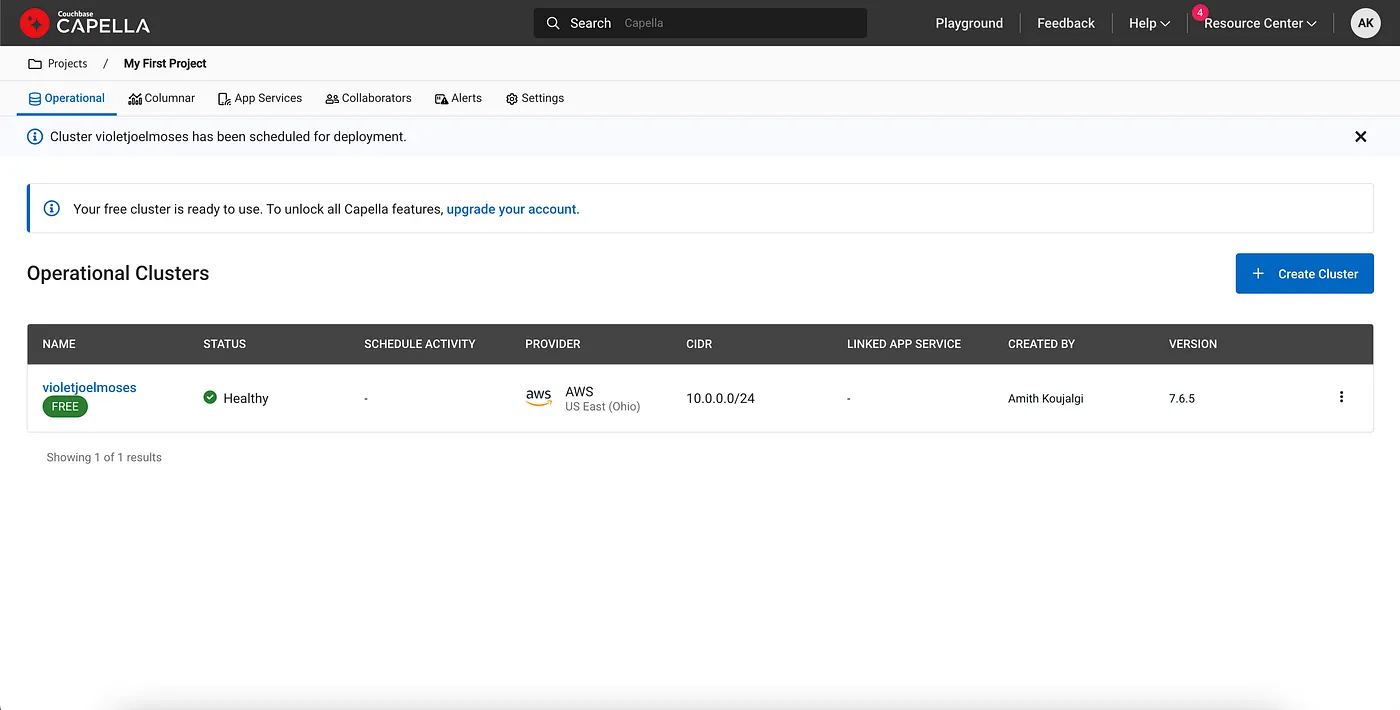
Once you’re in, you will be able to create a new database cluster. Click on the Operational tab and click on the
Create Cluster button.
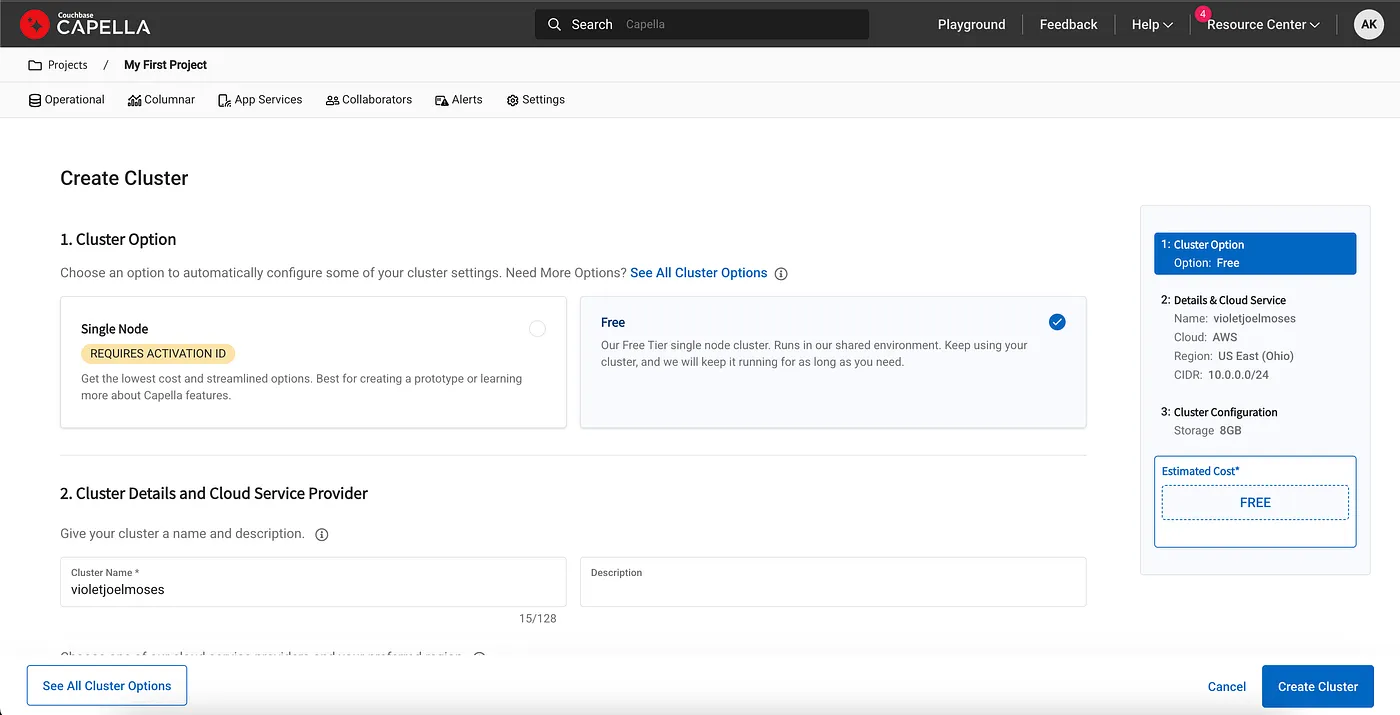
Select the default project named My First Project and click on the Continue button.

You’ll now see the available cluster options. Go ahead and select the Free option! 😍
Next, choose your preferred cloud provider (you can select any provider or stick with the default AWS provider).
Pick a region (or leave it set to the default).
Finally, click on the Create Cluster button to proceed.
Give it a couple of minutes, and let the magic happen as your cluster gets deployed.
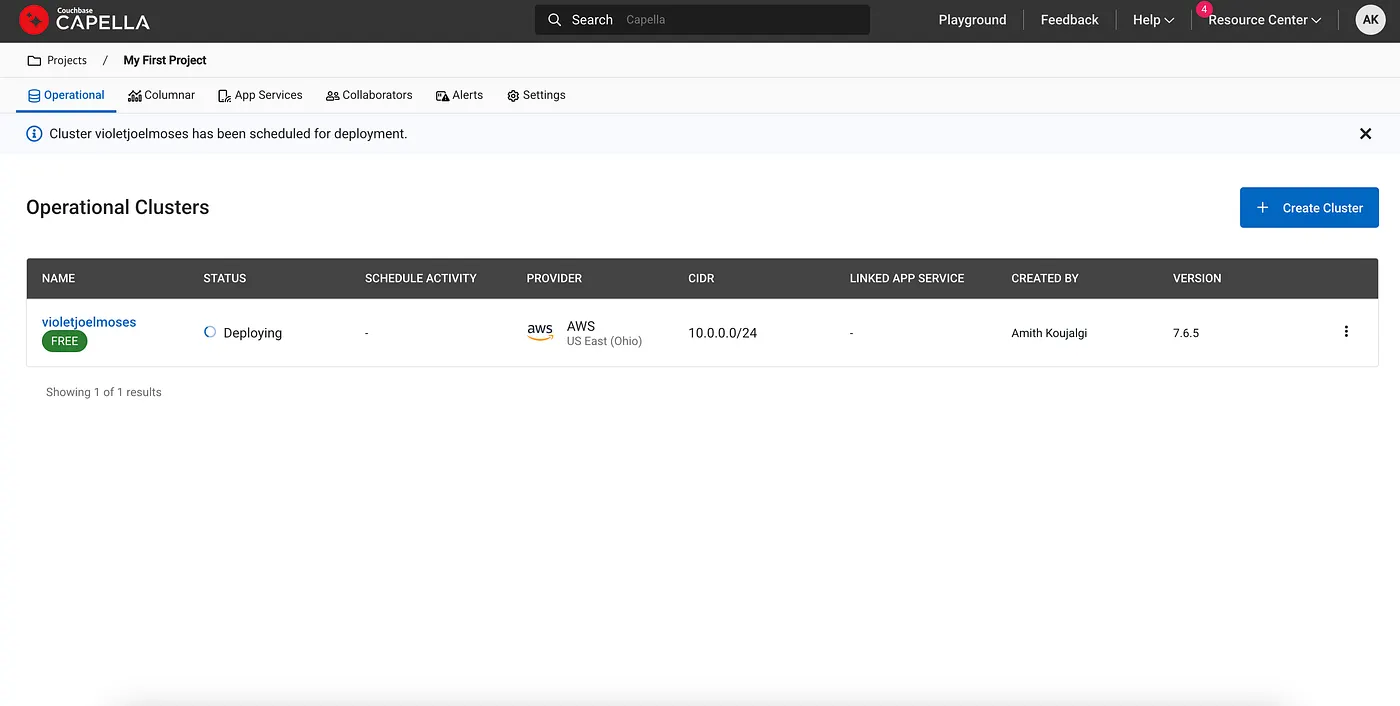
Once your cluster is deployed, you’ll see the status of your cluster as Healthy.
Click on the listed cluster to open its details. Here, you can view the version of the deployed Couchbase server, the
enabled services, as well as the cloud provider and region.
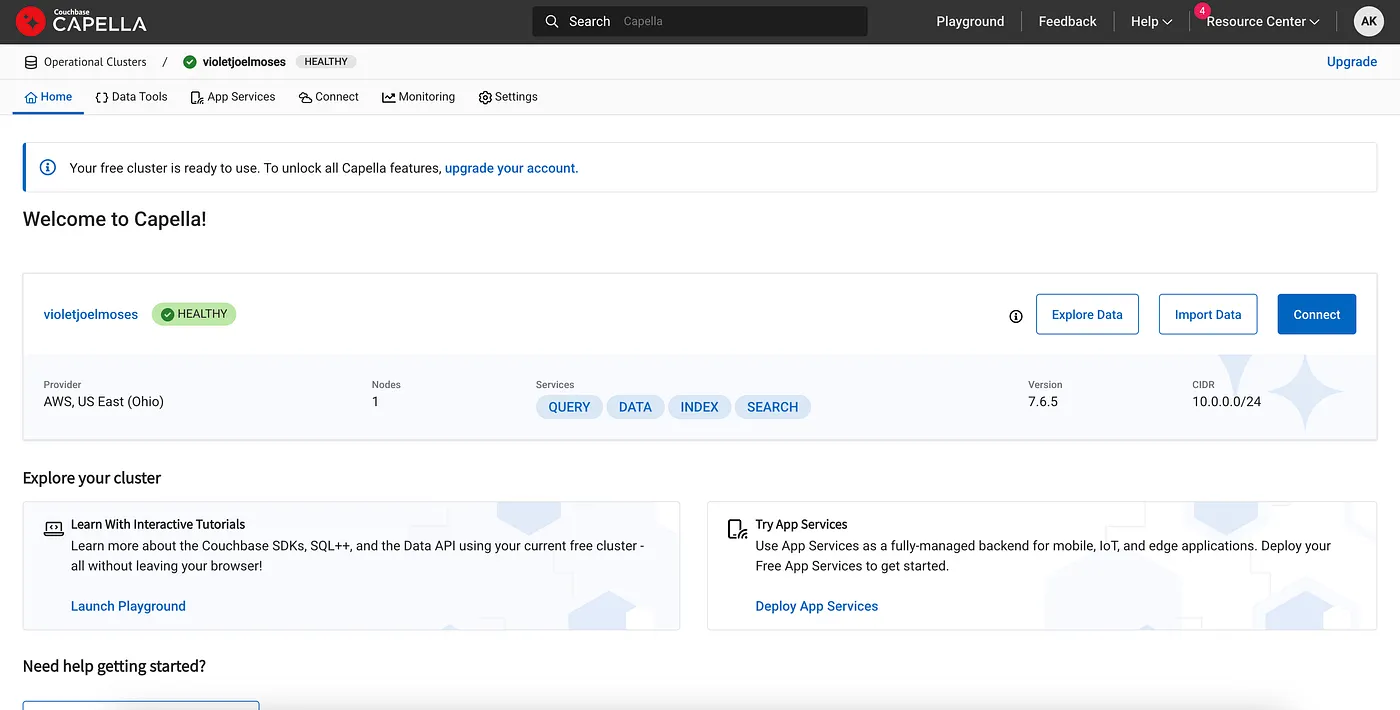
Click on Explore Data button. Notice that a default bucket called travel-sample with some sample data has
been created
for you.
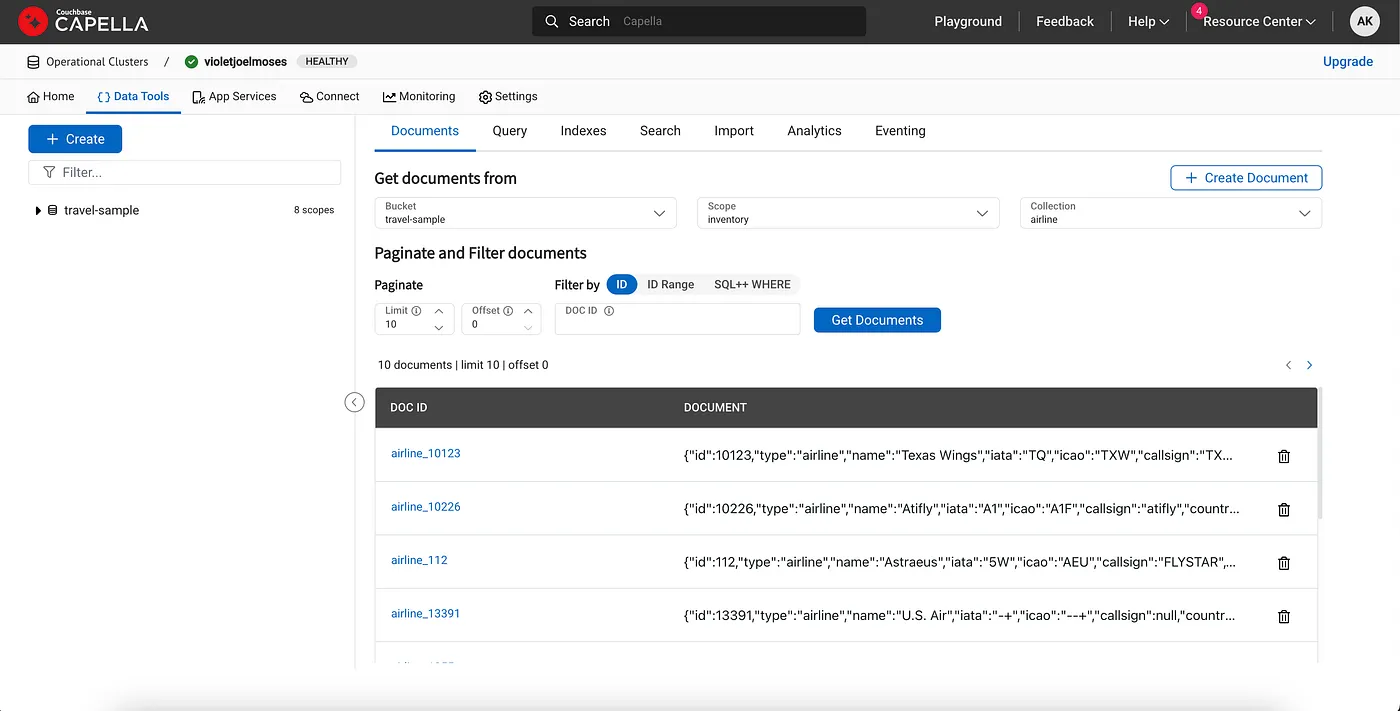
Browse through the collection to explore the pre-created buckets, scopes and collections available to you.
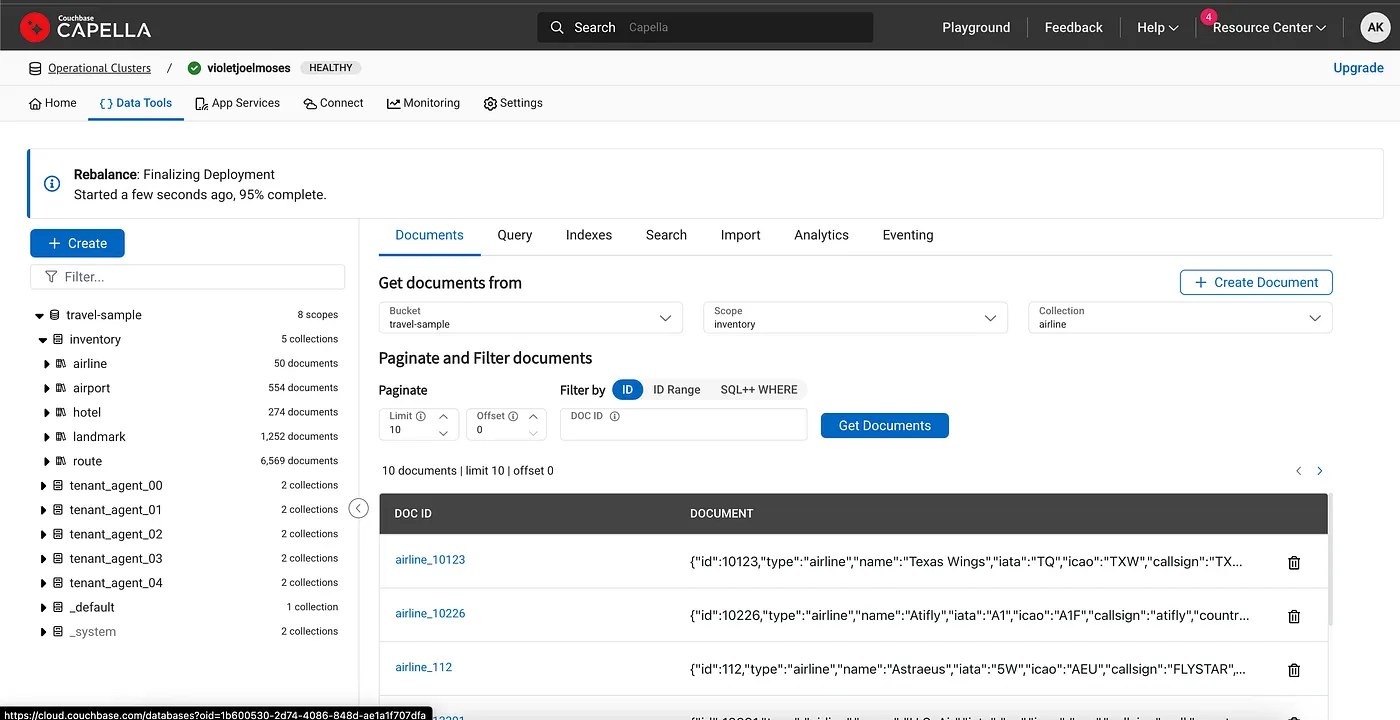
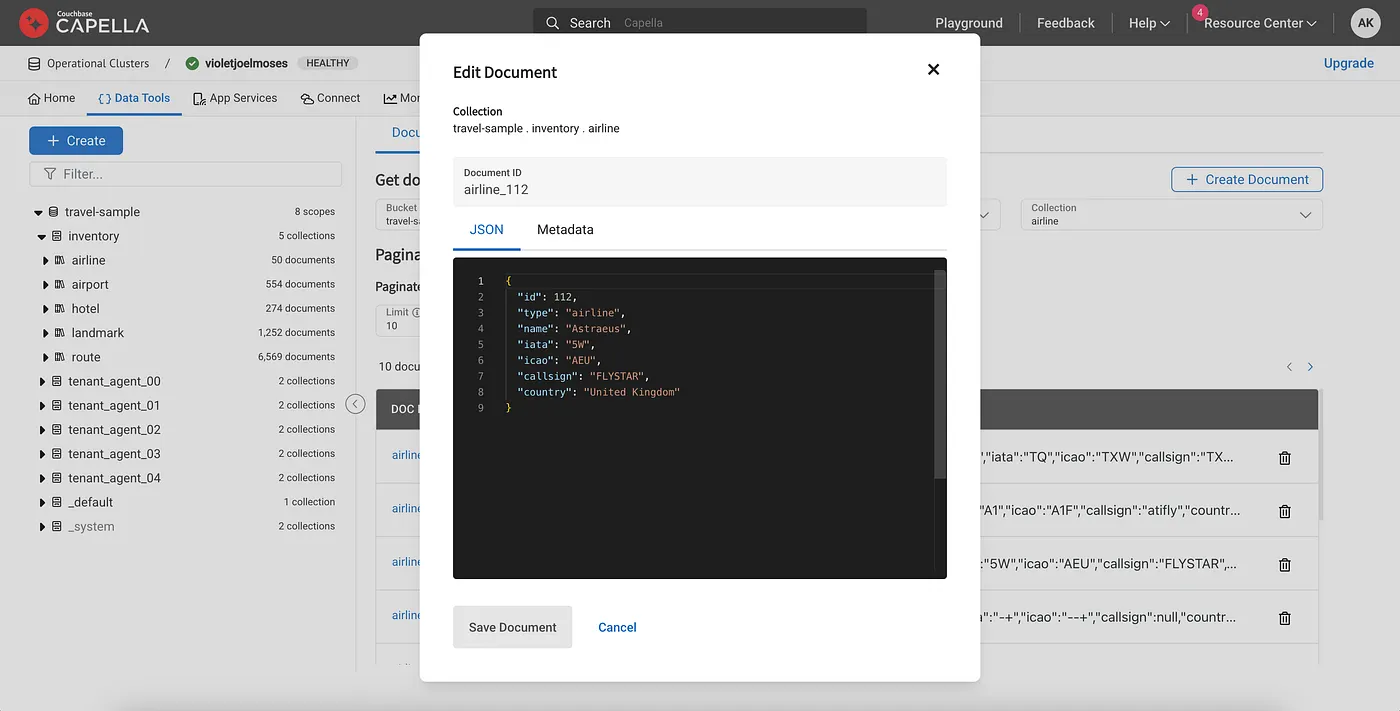
Open up a sample document from the travel-sample (bucket) > inventory (scope) > airline (collection)
to see the contents
of the document.
The document shown in the image below is about an airline named Astraeus, whose call sign (a unique name or code
used to
identify an airline or aircraft in communication) is FLYSTAR.
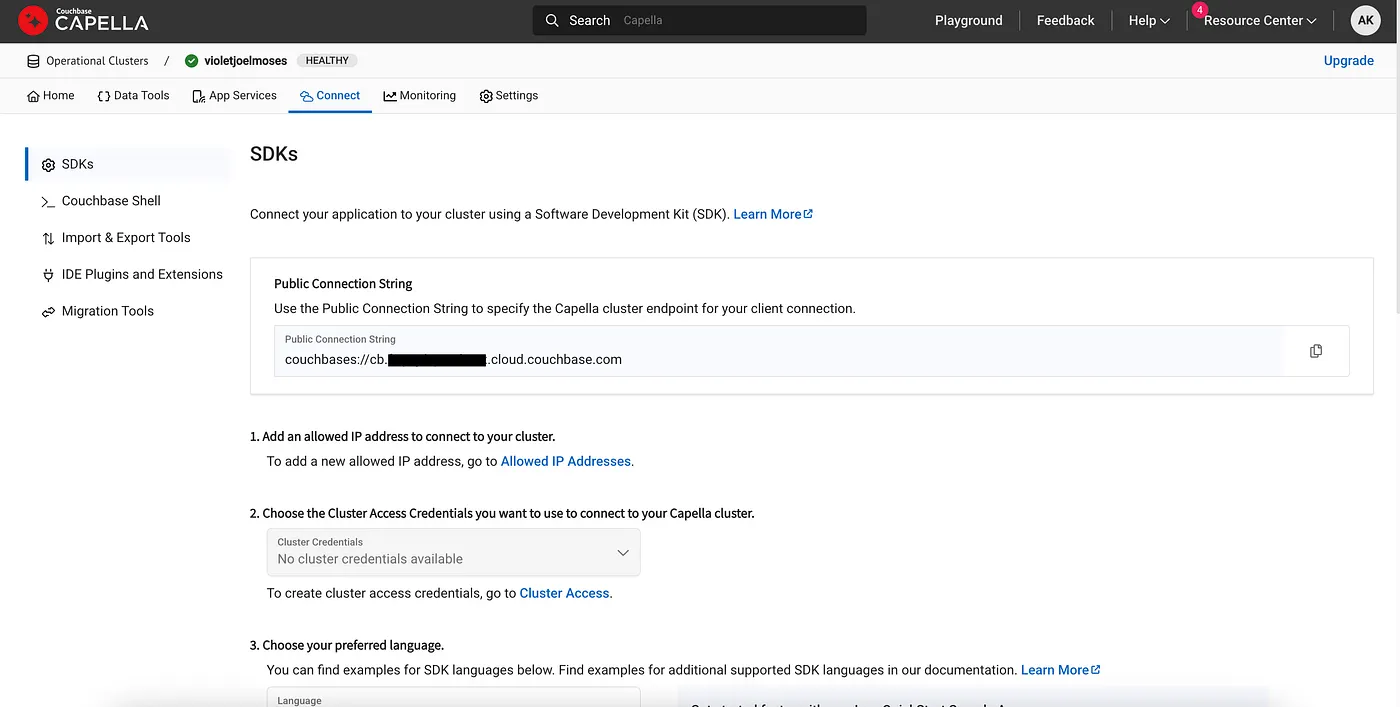
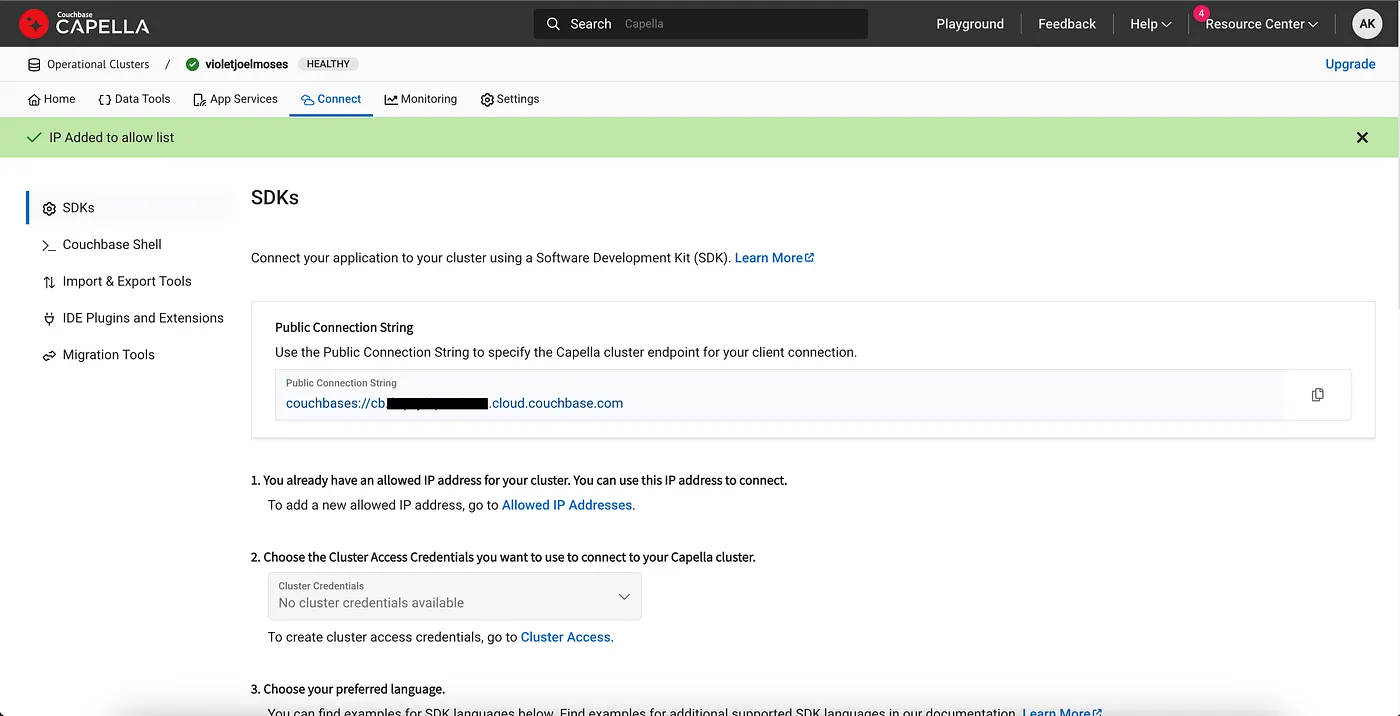
Navigate to the Connect tab, and you will see a Public Connection String that allows you to access the
Capella cluster
endpoint from your client application, which looks like the following URL:
couchbases://cb.uniqueclusteridentifer.cloud.couchbase.com
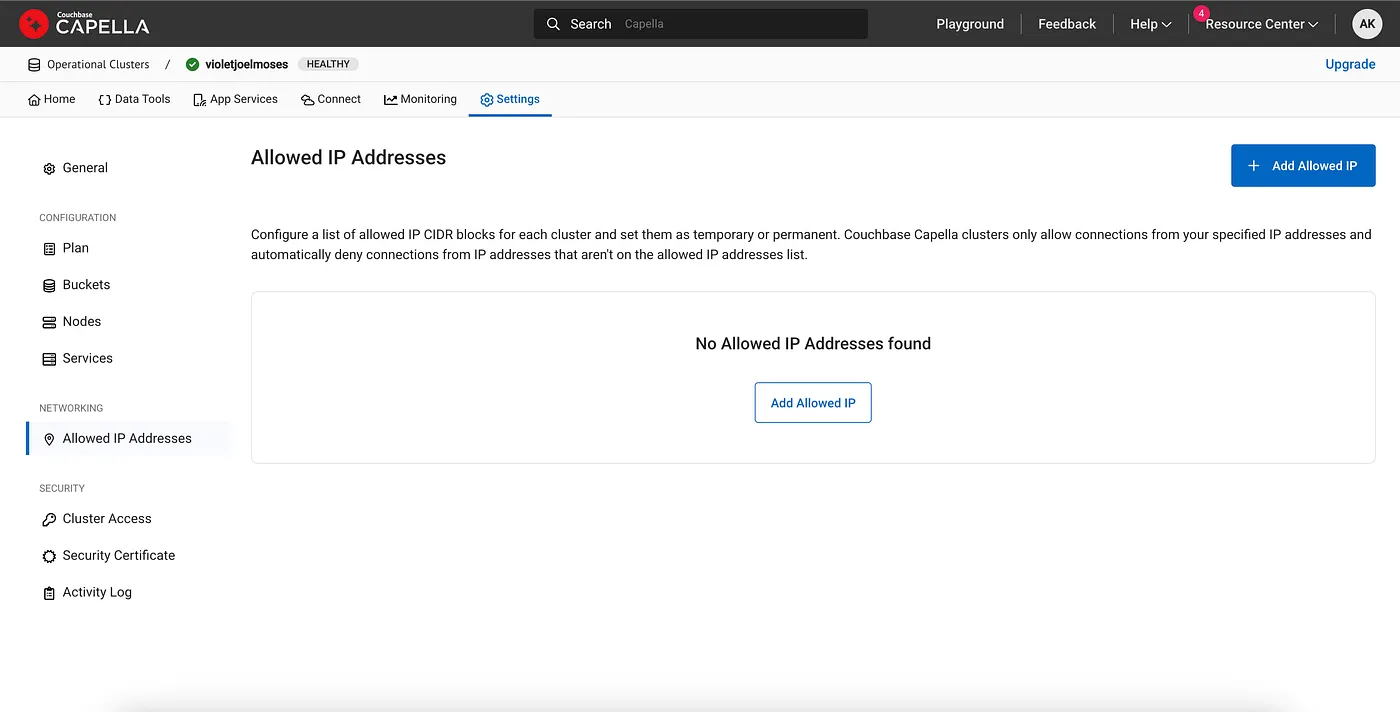
To access this cluster endpoint, you need to allow the IP addresses that are permitted to connect. Click on the
Settings
tab, which will take you to the Cluster Settings view. Then, click on Allowed IP Addresses in the left pane
under
Networking, where you can add allowed IP addresses. Then, click on the Add Allowed IP button.
You can either click on the Add Current IP Address button to limit access to your cluster to your IP address
alone, or
if you’d like to allow access from anywhere, click on the Allow Access from Anywhere button.
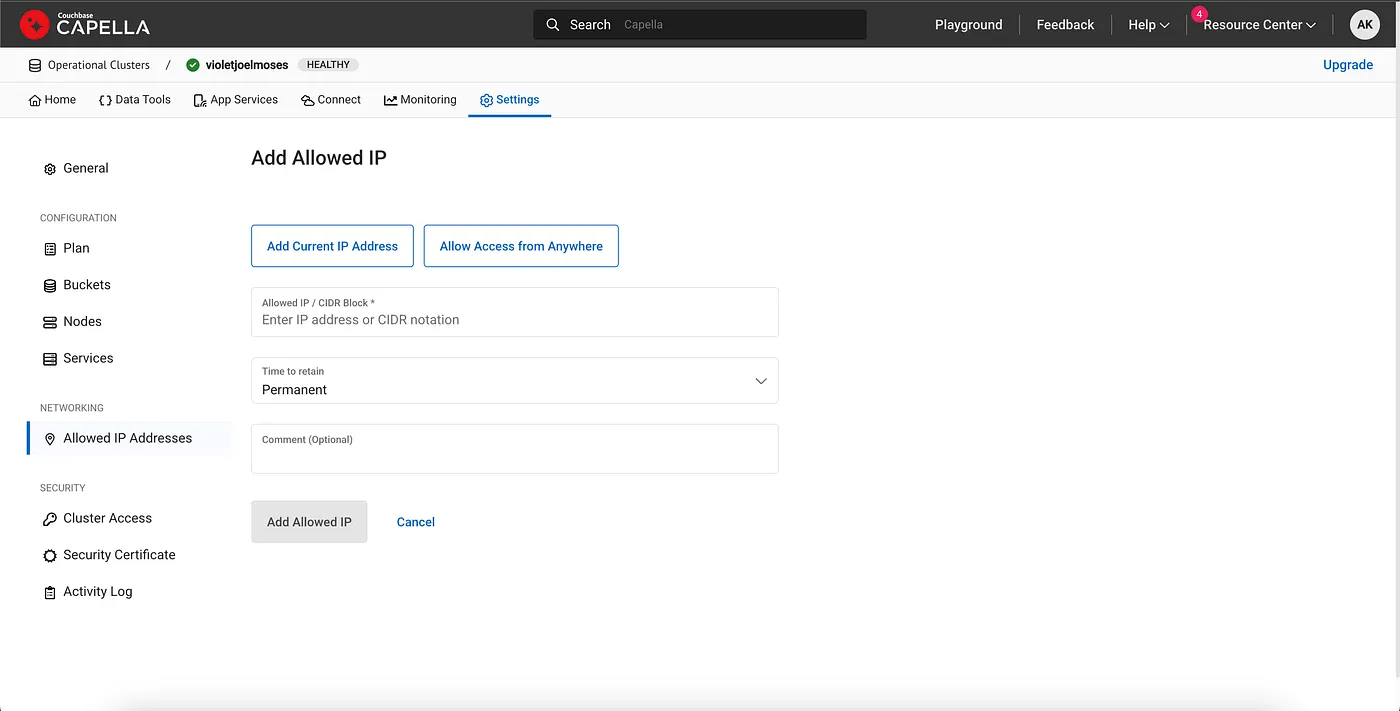
Confirm that you want to allow the IP addresses.

The IP addresses have now been added to the allow list, and the networking is set up.
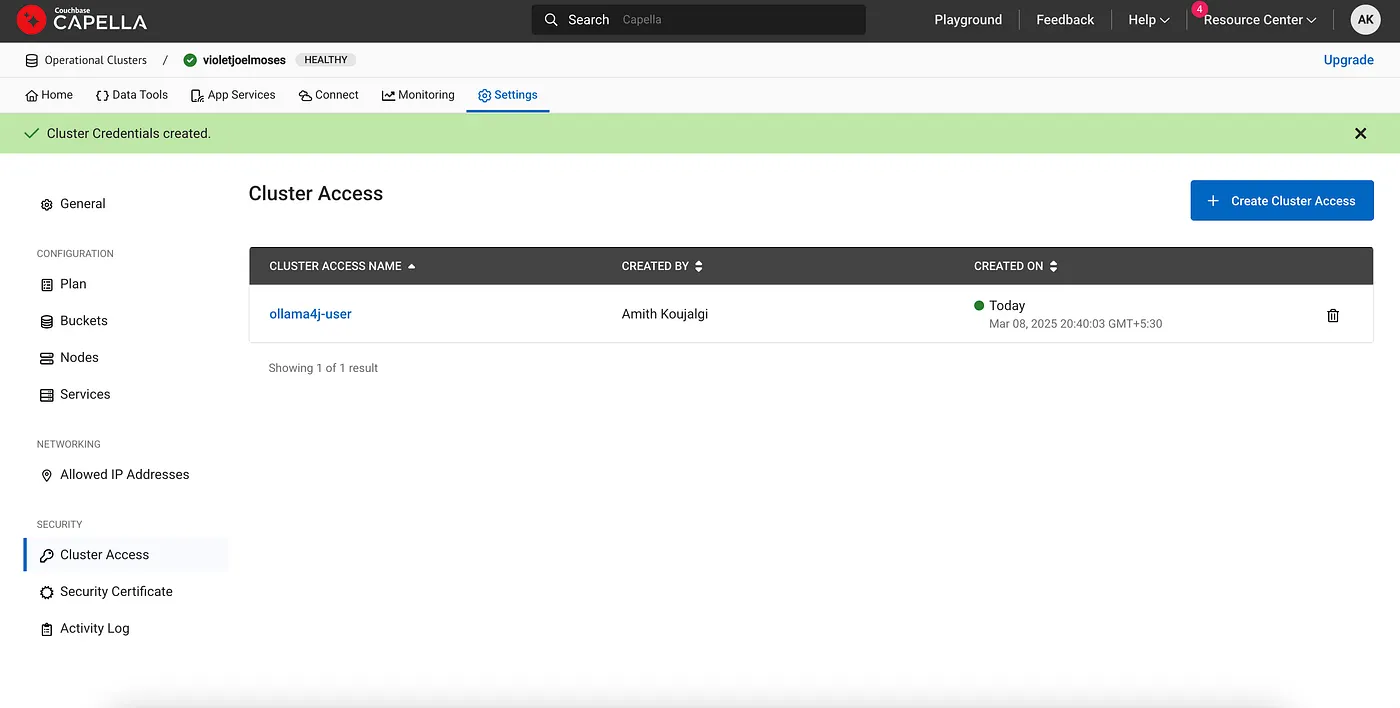
Now that you’ve allowed IP addresses, it’s time to create credentials for accessing the cluster using a username and
password. Click on the Cluster Access tab in the left pane, then click on the Create Cluster Access button.

Enter a username of your choice in the Cluster Access Name text field, and then enter a password of your choice in
the
Password text field.
Next, select the bucket, scope, and the read/write permissions you want these credentials to have access to. In this
example, I’ve granted access to all buckets and scopes with both read and write permissions.

Alright, your cluster access is now set up.
One last step: you just need to select the Cluster Access Credentials that you want to allow to connect to your
Capella
cluster. Head over to the Connect tab, then click on the SDKs tab in the left pane. Under Choose the
Cluster Access Credentials you want to use to connect to your Capella cluster, select the cluster credentials you
just created.

Awesome! Your cluster access is all set up, and you’re ready to connect to your Capella cluster using a Couchbase
client. That’s it — you’re all set and good to go!
Setting Up the Environment For Code
Before you begin, ensure you have the following components setup.
Java: Make sure you have Java 11+ installed on your system. Set it up
from here. Verify it by running the following
command in your terminal.
Maven: Make sure you have the Maven build system set up. Set it up from here.
Verify it by running the following command
in your terminal.
Ollama Server: Make sure you have installed the latest version of Ollama server and it is up
and running. Verify it by
running the following command in your terminal.
Model: You’ll need tool-calling model (such as Mistral) downloaded and ready to
serve from your Ollama server.
To download/pull the model into your Ollama server, run the following command in your terminal.
You can list the models available on your model server by running the following command in your terminal.
Once you have these, you can start setting up the application.
Setup pom.xml for your Maven project.
<?xml version="1.0" encoding="UTF-8"?>
<project xmlns="http://maven.apache.org/POM/4.0.0" xmlns:xsi="http://www.w3.org/2001/XMLSchema-instance"
xsi:schemaLocation="http://maven.apache.org/POM/4.0.0 http://maven.apache.org/xsd/maven-4.0.0.xsd">
<modelVersion>4.0.0</modelVersion>
<groupId>io.github.ollama4j.couchbase</groupId>
<artifactId>ollama4j-couchbase</artifactId>
<version>0.0.1</version>
<name>Ollama4j Couchbase</name>
<description>Talk to your data in Couchbase over Ollama4j</description>
<packaging>jar</packaging>
<properties>
<maven.compiler.release>11</maven.compiler.release>
<project.build.sourceEncoding>UTF-8</project.build.sourceEncoding>
<lombok.version>1.18.30</lombok.version>
</properties>
<build>
<plugins>
<plugin>
<groupId>org.apache.maven.plugins</groupId>
<artifactId>maven-source-plugin</artifactId>
<version>3.3.1</version>
<executions>
<execution>
<id>attach-sources</id>
<goals>
<goal>jar-no-fork</goal>
</goals>
</execution>
</executions>
</plugin>
<plugin>
<groupId>org.apache.maven.plugins</groupId>
<artifactId>maven-javadoc-plugin</artifactId>
<version>3.11.2</version>
<configuration>
<doclint>all,-missing</doclint>
</configuration>
<executions>
<execution>
<id>attach-javadocs</id>
<goals>
<goal>jar</goal>
</goals>
</execution>
</executions>
</plugin>
</plugins>
<pluginManagement>
<plugins>
<plugin>
<artifactId>maven-compiler-plugin</artifactId>
<version>3.14.0</version>
</plugin>
</plugins>
</pluginManagement>
</build>
<dependencies>
<dependency>
<groupId>io.github.ollama4j</groupId>
<artifactId>ollama4j</artifactId>
<version>ollama4j-revision</version>
</dependency>
<dependency>
<groupId>org.slf4j</groupId>
<artifactId>slf4j-api</artifactId>
<version>2.0.0</version>
</dependency>
<dependency>
<groupId>ch.qos.logback</groupId>
<artifactId>logback-classic</artifactId>
<version>1.4.12</version>
</dependency>
<dependency>
<groupId>com.couchbase.client</groupId>
<artifactId>java-client</artifactId>
<version>3.7.8</version>
</dependency>
<dependency>
<groupId>org.projectlombok</groupId>
<artifactId>lombok</artifactId>
<version>1.18.30</version>
<scope>provided</scope>
</dependency>
</dependencies>
</project>
Code Walkthrough
Here’s the main part of the implementation in the Java code.
package io.github.ollama4j.examples;


import com.couchbase.client.java.Bucket;
import com.couchbase.client.java.Cluster;
import com.couchbase.client.java.ClusterOptions;
import com.couchbase.client.java.Scope;
import com.couchbase.client.java.json.JsonObject;
import com.couchbase.client.java.query.QueryResult;
import io.github.ollama4j.OllamaAPI;
import io.github.ollama4j.exceptions.OllamaBaseException;
import io.github.ollama4j.exceptions.ToolInvocationException;
import io.github.ollama4j.tools.OllamaToolsResult;
import io.github.ollama4j.tools.ToolFunction;
import io.github.ollama4j.tools.Tools;
import io.github.ollama4j.utils.OptionsBuilder;
import io.github.ollama4j.utils.Utilities;
import lombok.AllArgsConstructor;
import lombok.Data;
import lombok.NoArgsConstructor;

import java.io.IOException;
import java.time.Duration;
import java.util.Arrays;
import java.util.Map;


public class CouchbaseToolCallingExample {

    public static void main(String[] args) throws IOException, ToolInvocationException, OllamaBaseException, InterruptedException {
        String connectionString = Utilities.getFromEnvVar("CB_CLUSTER_URL");
        String username = Utilities.getFromEnvVar("CB_CLUSTER_USERNAME");
        String password = Utilities.getFromEnvVar("CB_CLUSTER_PASSWORD");
        String bucketName = "travel-sample";

        Cluster cluster = Cluster.connect(
                connectionString,
                ClusterOptions.clusterOptions(username, password).environment(env -> {
                    env.applyProfile("wan-development");
                })
        );

        String host = Utilities.getFromConfig("host");
        String modelName = Utilities.getFromConfig("tools_model_mistral");

        OllamaAPI ollamaAPI = new OllamaAPI(host);
        ollamaAPI.setVerbose(false);
        ollamaAPI.setRequestTimeoutSeconds(60);

        Tools.ToolSpecification callSignFinderToolSpec = getCallSignFinderToolSpec(cluster, bucketName);
        Tools.ToolSpecification callSignUpdaterToolSpec = getCallSignUpdaterToolSpec(cluster, bucketName);

        ollamaAPI.registerTool(callSignFinderToolSpec);
        ollamaAPI.registerTool(callSignUpdaterToolSpec);

        String prompt1 = "What is the call-sign of Astraeus?";
        for (OllamaToolsResult.ToolResult r : ollamaAPI.generateWithTools(modelName, new Tools.PromptBuilder()
                .withToolSpecification(callSignFinderToolSpec)
                .withPrompt(prompt1)
                .build(), new OptionsBuilder().build()).getToolResults()) {
            AirlineDetail airlineDetail = (AirlineDetail) r.getResult();
            System.out.println(String.format("[Result of tool '%s']: Call-sign of %s is '%s'! ✈️", r.getFunctionName(), airlineDetail.getName(), airlineDetail.getCallsign()));
        }

        String prompt2 = "I want to code name Astraeus as STARBOUND";
        for (OllamaToolsResult.ToolResult r : ollamaAPI.generateWithTools(modelName, new Tools.PromptBuilder()
                .withToolSpecification(callSignUpdaterToolSpec)
                .withPrompt(prompt2)
                .build(), new OptionsBuilder().build()).getToolResults()) {
            Boolean updated = (Boolean) r.getResult();
            System.out.println(String.format("[Result of tool '%s']: Call-sign is %s! ✈️", r.getFunctionName(), updated ? "updated" : "not updated"));
        }

        String prompt3 = "What is the call-sign of Astraeus?";
        for (OllamaToolsResult.ToolResult r : ollamaAPI.generateWithTools(modelName, new Tools.PromptBuilder()
                .withToolSpecification(callSignFinderToolSpec)
                .withPrompt(prompt3)
                .build(), new OptionsBuilder().build()).getToolResults()) {
            AirlineDetail airlineDetail = (AirlineDetail) r.getResult();
            System.out.println(String.format("[Result of tool '%s']: Call-sign of %s is '%s'! ✈️", r.getFunctionName(), airlineDetail.getName(), airlineDetail.getCallsign()));
        }
    }

    public static Tools.ToolSpecification getCallSignFinderToolSpec(Cluster cluster, String bucketName) {
        return Tools.ToolSpecification.builder()
                .functionName("airline-lookup")
                .functionDescription("You are a tool who finds only the airline name and do not worry about any other parameters. You simply find the airline name and ignore the rest of the parameters. Do not validate airline names as I want to use fake/fictitious airline names as well.")
                .toolFunction(new AirlineCallsignQueryToolFunction(bucketName, cluster))
                .toolPrompt(
                        Tools.PromptFuncDefinition.builder()
                                .type("prompt")
                                .function(
                                        Tools.PromptFuncDefinition.PromptFuncSpec.builder()
                                                .name("get-airline-name")
                                                .description("Get the airline name")
                                                .parameters(
                                                        Tools.PromptFuncDefinition.Parameters.builder()
                                                                .type("object")
                                                                .properties(
                                                                        Map.of(
                                                                                "airlineName", Tools.PromptFuncDefinition.Property.builder()
                                                                                        .type("string")
                                                                                        .description("The name of the airline. e.g. Emirates")
                                                                                        .required(true)
                                                                                        .build()
                                                                        )
                                                                )
                                                                .required(java.util.List.of("airline-name"))
                                                                .build()
                                                )
                                                .build()
                                )
                                .build()
                )
                .build();
    }

    public static Tools.ToolSpecification getCallSignUpdaterToolSpec(Cluster cluster, String bucketName) {
        return Tools.ToolSpecification.builder()
                .functionName("airline-update")
                .functionDescription("You are a tool who finds the airline name and its callsign and do not worry about any validations. You simply find the airline name and its callsign. Do not validate airline names as I want to use fake/fictitious airline names as well.")
                .toolFunction(new AirlineCallsignUpdateToolFunction(bucketName, cluster))
                .toolPrompt(
                        Tools.PromptFuncDefinition.builder()
                                .type("prompt")
                                .function(
                                        Tools.PromptFuncDefinition.PromptFuncSpec.builder()
                                                .name("get-airline-name-and-callsign")
                                                .description("Get the airline name and callsign")
                                                .parameters(
                                                        Tools.PromptFuncDefinition.Parameters.builder()
                                                                .type("object")
                                                                .properties(
                                                                        Map.of(
                                                                                "airlineName", Tools.PromptFuncDefinition.Property.builder()
                                                                                        .type("string")
                                                                                        .description("The name of the airline. e.g. Emirates")
                                                                                        .required(true)
                                                                                        .build(),
                                                                                "airlineCallsign", Tools.PromptFuncDefinition.Property.builder()
                                                                                        .type("string")
                                                                                        .description("The callsign of the airline. e.g. Maverick")
                                                                                        .enumValues(Arrays.asList("petrol", "diesel"))
                                                                                        .required(true)
                                                                                        .build()
                                                                        )
                                                                )
                                                                .required(java.util.List.of("airlineName", "airlineCallsign"))
                                                                .build()
                                                )
                                                .build()
                                )
                                .build()
                )
                .build();
    }
}

class AirlineCallsignQueryToolFunction implements ToolFunction {
    private final String bucketName;
    private final Cluster cluster;

    public AirlineCallsignQueryToolFunction(String bucketName, Cluster cluster) {
        this.bucketName = bucketName;
        this.cluster = cluster;
    }

    @Override
    public AirlineDetail apply(Map<String, Object> arguments) {
        String airlineName = arguments.get("airlineName").toString();

        Bucket bucket = cluster.bucket(bucketName);
        bucket.waitUntilReady(Duration.ofSeconds(10));

        Scope inventoryScope = bucket.scope("inventory");
        QueryResult result = inventoryScope.query(String.format("SELECT * FROM airline WHERE name = '%s';", airlineName));

        JsonObject row = (JsonObject) result.rowsAsObject().get(0).get("airline");
        return new AirlineDetail(row.getString("callsign"), row.getString("name"), row.getString("country"));
    }
}

class AirlineCallsignUpdateToolFunction implements ToolFunction {
    private final String bucketName;
    private final Cluster cluster;

    public AirlineCallsignUpdateToolFunction(String bucketName, Cluster cluster) {
        this.bucketName = bucketName;
        this.cluster = cluster;
    }


    @Override
    public Boolean apply(Map<String, Object> arguments) {
        String airlineName = arguments.get("airlineName").toString();
        String airlineNewCallsign = arguments.get("airlineCallsign").toString();

        Bucket bucket = cluster.bucket(bucketName);
        bucket.waitUntilReady(Duration.ofSeconds(10));

        Scope inventoryScope = bucket.scope("inventory");
        String query = String.format("SELECT * FROM airline WHERE name = '%s';", airlineName);

        QueryResult result;
        try {
            result = inventoryScope.query(query);
        } catch (Exception e) {
            throw new RuntimeException("Error executing query", e);
        }

        if (result.rowsAsObject().isEmpty()) {
            throw new RuntimeException("Airline not found with name: " + airlineName);
        }

        JsonObject row = (JsonObject) result.rowsAsObject().get(0).get("airline");

        if (row == null) {
            throw new RuntimeException("Airline data is missing or corrupted.");
        }

        String currentCallsign = row.getString("callsign");

        if (!airlineNewCallsign.equals(currentCallsign)) {
            JsonObject updateQuery = JsonObject.create()
                    .put("callsign", airlineNewCallsign);

            inventoryScope.query(String.format(
                    "UPDATE airline SET callsign = '%s' WHERE name = '%s';",
                    airlineNewCallsign, airlineName
            ));
            return true;
        }
        return false;
    }
}

@SuppressWarnings("ALL")
@Data
@AllArgsConstructor
@NoArgsConstructor
class AirlineDetail {
    private String callsign;
    private String name;
    private String country;
}
Key Concepts
1. Ollama API Client Setup
OllamaAPI ollamaAPI = new OllamaAPI(host);

ollamaAPI.setRequestTimeoutSeconds(60);
Here, we initialize the Ollama API client and configure it with the host of the Ollama server, where the model is hosted
and can handle API requests. Additionally, we set the request timeout to 60 seconds to ensure that even if the model
takes longer to respond, the request will still be processed.
The ToolSpecification class defines how the model will interact with the Couchbase database. We define a function that
queries the database for airline details based on the airline name.
Tools.ToolSpecification callSignFinderToolSpec = getCallSignFinderToolSpec(cluster, bucketName);

ollamaAPI.registerTool(callSignFinderToolSpec);
This step registers custom tools with Ollama that allows the tool-calling model to invoke database queries.
3. Query Execution
The tool will execute a Couchbase N1QL query to retrieve the airline details:
QueryResult result = inventoryScope.query(String.format("SELECT * FROM airline WHERE name = '%s';", airlineName));
The result is processed and returned as an AirlineDetail object.
4. Set up your prompt (question)
String prompt = "What is the call-sign of Astraeus?";
for (OllamaToolsResult.ToolResult r : ollamaAPI.generateWithTools(modelName, new Tools.PromptBuilder()
        .withToolSpecification(callSignFinderToolSpec)
        .withPrompt(prompt)
        .build(), new OptionsBuilder().build()).getToolResults()) {
    AirlineDetail airlineDetail = (AirlineDetail) r.getResult();
    System.out.printf("[Result of tool '%s']: Call-sign of %s is '%s'! ✈️", r.getFunctionName(), airlineDetail.getName(), airlineDetail.getCallsign());
}
This invokes the tool-calling model (Mistral in this case) with the provided prompt and uses the registered tool to
query the database. The result is returned and printed to the console.
So, we ask the following question to the model.
What is the call-sign of Astraeus?
And, here’s what the model responds:
Call-sign of Astraeus is ‘FLYSTAR’! ✈️
Isn’t that amazing? Now, let’s enhance it further by adding a function that allows us to update an airline’s call sign
using natural language.
Let’s define another ToolSpecificationclass that defines how the model will interact with the Couchbase database to
update the database. We define a function that queries the database for airline details based on the airline name and
then update the airline’s callsign.
Tools.ToolSpecification callSignUpdaterToolSpec = getCallSignUpdaterToolSpec(cluster, bucketName);

ollamaAPI.registerTool(callSignUpdaterToolSpec);
The tool will execute a Couchbase N1QL query to update the airline’s callsign.
inventoryScope.query(String.format(
        "UPDATE airline SET callsign = '%s' WHERE name = '%s';",
        airlineNewCallsign, airlineName
));
Setup the prompt to instruct the model to update the airline’s callsign.
String prompt = "I want to code name Astraeus as STARBOUND";
And then we invoke the model with the new prompt.
String prompt = "I want to code name Astraeus as STARBOUND";
for (OllamaToolsResult.ToolResult r : ollamaAPI.generateWithTools(modelName, new Tools.PromptBuilder()
        .withToolSpecification(callSignUpdaterToolSpec)
        .withPrompt(prompt)
        .build(), new OptionsBuilder().build()).getToolResults()) {
    Boolean updated = (Boolean) r.getResult();
    System.out.println(String.format("[Result of tool '%s']: Call-sign is %s! ✈️", r.getFunctionName(), updated ? "updated" : "not updated"));
}
This invokes the tool-calling model (Mistral in this case) with the new prompt and uses the registered tool to update
the database.
So, we ask the following question to the model.
I want to code name Astraeus as STARBOUND.
And, here’s what the model responds:
Call-sign is updated! ✈️
How amazing is that? The possibilities for interacting with your data using natural language are endless. You could
integrate features like checking flight availability, booking tickets, retrieving ticket details, and so much more!
Feel free to extend this example further by adding more sophisticated capabilities! 🚀
Conclusion
With the code above, you can use Ollama’s hosted models (like Mistral) to query a Couchbase database using natural
language prompts. This makes it possible to interact with databases in a more intuitive and human-like way.
By leveraging Ollama4j, you can connect AI models to real-world applications and build powerful tools that can automate
complex tasks or simply make querying your data more conversational.
You can find the full code and more such examples from
the ollama4j-examples GitHub repository.
Credit to Couchbase, Ollama, and all the model teams for providing us with such amazing software!